

Recently I decided to rebuild my blog using Next.js powered by Prismic.io. If you haven't heard of Next.js it is a minimalistic framework for server-rendered React applications. Prismic is a headless CMS that is super easy to use and has a very reasonable free tier. I wanted to share my experience of working with these technologies and decided on doing a series of posts that will cover:
In this post:
- Setting up Prismic to power your Blog
- Building out your application using Next.js to display your blog
Future posts:
- Managing SEO, JSON-LD and Open Graph Tags
- Setting up Prismic's preview option
- Adding Google Analytics
- Using Prismic's slices
- Code Syntax Highlighting blocks
The posts will focus on the most basic version of the blog with little to no styling. So with that in mind let's get started.
Hello World
In this first part we are going to set up a basic Next.js project and render out a good old "Hello World" to make sure everything is rosey. First up create a new directory and in it run yarn init. Follow the prompts and fill in your details.
Next we are going to install a few dependencies that we will need. In the same directory, in your terminal run the following command:
Next we are going to install a few dependencies that we will need. In the same directory, in your terminal run the following command:
yarn add next react react-dom express prismic-javascript prismic-reactjsFor our blog we will have custom routes so we are going to need a custom server. To do this we will create a new file, server.js at the route of our project.
// server.js
const express = require("express");
const dev = process.env.NODE_ENV !== "production";
const next = require("next");
const app = next({ dev });
const handle = app.getRequestHandler();

app
  .prepare()
  .then(() => {
    const server = express();

    server.get("*", (req, res) => handle(req, res));

    server.listen(3000, (err) => {
      if (err) throw err;
      console.log("> Ready http://localhost:3000 <");
    });
  })
  .catch((ex) => {
    console.error(ex.stack);
    process.exit(1);
  });
Now in the above server we are starting an Next.js instance and an express server. We then have a catch all that will serve all of our requests. We will revisit this file a little later on when we add our blog detail page route.
Lets create the homepage of the blog and for now we just want to render "Hello World". At the route of the project create a new directory, pages and in that create a file, index.js. By default Next.js will render this page when we first start the app and navigate to /.
// pages/index.js
const Index = () => <div>Hello World</div>;

export default Index;
Were almost ready to test them out! We just need to add a couple of scripts to our package.json to actually kick things off. Add the following block anywhere in your package.json file.
"scripts": {
  "dev": "node server.js",
  "build": "next build",
  "start": "NODE_ENV=production node server.js"
}
Let's take a closer look at each of the scripts.
Running yarn dev will run the application in development mode, if you hadn't already guessed that. When running Next in development mode we get HMR (Hot Module Replacement), this means that you don't need to manually refresh the page.
Running yarn build will build a production ready distribution of our code, this will go into the .next directory at the root of your project which is auto generated.
Running yarn start will then run the application in production mode leveraging our previous build.
Try running yarn dev and navigate to http://localhost:3000/ where you should see Hello World. If that works try the same for production, by running yarn build followed by yarn start and again navigate to http://localhost:3000/. We now have a base application ready to start building upon to build our blog.
Prismic Blog
Before we go any further let's get set up on Prismic. To continue you will need to sign up for an account with Prismic. When that's done log in and we are good to go. You should be greeted with a call to action to create a custom type and that's exactly what we want to do. If not, you should be able to find a link to custom types in the left side bar. We want to create blog posts, so we will go with a repeatable type and give it a name of Blog Post.

We can now add content fields to our blog post type. Prismic offers a drag and drop build mode, but to keep things simple I have supplied the JSON required to build up our custom fields. In your custom type, click on JSON Editor and paste the snippet below and save.
{
  "Main": {
    "title": {
      "type": "StructuredText",
      "config": {
        "single": "heading1",
        "label": "Title"
      }
    },
    "uid": {
      "type": "UID",
      "config": {
        "label": "Url"
      }
    },
    "body": {
      "type": "StructuredText",
      "config": {
        "multi": "paragraph, preformatted, heading1, heading2, heading3, heading4, heading5, heading6, strong, em, hyperlink, image, embed, list-item, o-list-item, o-list-item",
        "label": "Body"
      }
    }
  }
}
You should be seeing something along the lines of:

What have we added here?
Title - You guessed it, this will be the title of your blog post.
Url - This will be an auto generated slug from your title, but by adding this field, it allows you to edit the outputted path. This helpful for SEO for example or to remove strange characters.
Body - This is a rich text block that you will write the contents of your blog post.
Granted this is a very simple set up, but is more than enough to get you up and running with a simple blog. You may have noticed an option for Slices. These are extremely powerful and I will be following this post up with another that expands all you have covered in this post including how to leverage slices.
Publishing your first post
Ok let's create a very creative blog post and get it displaying in our application. First up on Prismic head to your Content tab (left sidebar) and click new to create a new blog post. From here give your post a random title, then fill out the body with some text, (or lorem ipsum) so that we can render it. From here click save followed by clicking publish. We now have a blog post published. We just need to display it.
Next.js Blog
API Service
Ok back to the code, now that we have our post on Prismic we will need a way of retrieving it. So let's create a service to query the API. For the API we are going to need your API url, which the base is the name of the repository you created for your blog in Prismic. You can see this in the url when you are editing your blog. Mine for example is https://nextjs-blog.prismic.io/. Let's create a config.js file at the root of the project to hold some variables and export a new constant, PRISMIC_API_URL. Which will be your url with api/v2 appended to it. Below is an example of how mine looks:
export const PRISMIC_API_URL = "https://nextjs-blog.prismic.io/api/v2";Next, in the root of your project create a directory api and within that create a file index.js. This is where we will add our functions to query the API.
// api/index.js
import Prismic from "prismic-javascript";
import { PRISMIC_API_URL } from "../config";

const getBlogPostsAPI = async (params) => {
  try {
    // We initialise the API with Prismic's kit
    const API = await Prismic.api(PRISMIC_API_URL);
    // Here we just query the documents with a filter of only returning
    // the type of blog_post and order them. Full docs can be found here:
    // https://github.com/prismicio/prismic-javascript#query-the-content
    const response = await API.query(
      Prismic.Predicates.at("document.type", "blog_post"),
      {
        orderings: "[my.blog_post.date desc]",
        ...params,
        // params will be extra parameters we can pass through with api calls
        // such as how many documents to return
      },
    );
    return response;
  } catch (error) {
    return error;
  }
};

export { getBlogPostsAPI };
We will be calling the API shortly from the homepage.
Custom Layout
One common thing you see in websites is a consistent header and footer. So as an example of that let's create a default layout for our blog that all of our pages will use. At the root of the project let's create a new directory layouts and with that a file index.js.
// layouts/index.js
const DefaultLayout = ({ children }) => (
  <div>
    <header>
      <h1>Next.js & Prismic.io Blog</h1>
    </header>
    <main>{children}</main>
  </div>
);

export default DefaultLayout;
Ok so let's edit the homepage to do something a little more exciting than display "Hello World". I won't go into too much detail on the basics of Next.js as they have some excellent documentation and tutorials, but see some of the comments for some custom bits we are doing.
// pages/index.js
import Link from "next/link";
import { getBlogPostsAPI } from "../api";
// We create this in just a tick
import { linkResolver } from "../helpers";
/**
 * As you can see we are importing our layout here,
 * and below we wrap all of the page in it.
 */
import DefaultLayout from "../layouts";

const Index = ({ posts = [] }) => (
  <DefaultLayout>
    <h2>Recent Blog Posts</h2>
    <ul>
      {posts.map((post, index) => (
        <li key={index}>
          <Link
            as={linkResolver(post)}
            href={`/blogPost?slug=${post.uid}`}
            passHref
          >
            <a>{post.data.title[0].text}</a>
          </Link>
        </li>
      ))}
    </ul>
  </DefaultLayout>
);

Index.getInitialProps = async () => {
  // Here we call the API and request 5 documents
  const response = await getBlogPostsAPI({ pageSize: 5 });
  return {
    posts: response.results,
  };
};

export default Index;
You may have noticed we are importing a new function above, linkResolver which we haven't created just yet. This will be a helper function used to generate the correct path based on the document type. For us it will be quite simple as we only have blog post document types. But it will be needed by the Prismic library for the rich text blocks and we can leverage like above, so we will create it now. Create a new directory at the root, helpers and a new file index.js within it.
// helpers/index.js
function linkResolver(doc) {
  if (doc.type === "blog_post") {
    return `/blog/${doc.uid}`;
  }
  return "/";
}

module.exports = {
  linkResolver,
};
As you can see above all we are doing is checking the doc type and building up the path based on it. This will also be used on the server in a later post so that's why we are using module.exports. With that last little bit we should be able to test it out. When I am testing things out I like to check development mode as well as production mode. Running both and navigating to http://localhost:3000/ you should see something along the lines of:
Blog Details Page
You may have noticed if you try to follow the link to the blog post it's broken. Let's fix that! First let's create a new page for the blog details, blogPost.js in the pages directory and add the following code:
// pages/blogPost.js
import React, { Component } from "react";
// RichText is give to us
import { RichText } from "prismic-reactjs";
// A new API request that will create in just a tick
import { getBlogPostAPI } from "../api";
import linkResolver from "../helpers";
// Here we are reusing our layout again
import DefaultLayout from "../layouts";

export default class BlogPost extends Component {
  static async getInitialProps(context) {
    // we get the slug of the post so that we can
    // query the API with it
    const { slug } = context.query;
    const response = await getBlogPostAPI(slug);
    return {
      post: response,
    };
  }

  render() {
    const post = this.props.post.data;
    return (
      <DefaultLayout>
        <article>
          <h1>{post.title.length ? post.title[0].text : ""}</h1>
          {/* Here we pass our rich text field to Prismics RichText renderer, along with our linkResolver */}
          {RichText.render(post.body, linkResolver)}
        </article>
      </DefaultLayout>
    );
  }
}
In our index.js file within the api directory let's add the following function:
// api/index.js
// ... previous code above ...

const getBlogPostAPI = async (slug) => {
  try {
    const API = await Prismic.api(PRISMIC_API_URL);
    // we pass up the slug to request the correct post
    const response = await API.query(
      Prismic.Predicates.at("my.blog_post.uid", slug),
    );
    return response.results[0];
  } catch (error) {
    console.error(error);
    return error;
  }
};

// Don't forget to export newly created function
export { getBlogPostsAPI, getBlogPostAPI };
We also need to update the server to handle custom route. Below is the full server.js file with the addition of the block handling the route '/blog/:slug'.
// server.js
const express = require("express");
const dev = process.env.NODE_ENV !== "production";
const next = require("next");
const app = next({ dev });
const handle = app.getRequestHandler();

app
  .prepare()
  .then(() => {
    const server = express();
    // Here we are handling our custom route, this
    // now work for server side rendering
    server.get("/blog/:slug", (req, res) => {
      const nextJsPage = "/blogPost";
      const queryParams = { slug: req.params.slug };
      app.render(req, res, nextJsPage, queryParams);
    });

    server.get("*", (req, res) => handle(req, res));

    server.listen(3000, (err) => {
      if (err) throw err;
      console.log("> Ready http://localhost:3000 <");
    });
  })
  .catch((ex) => {
    console.error(ex.stack);
    process.exit(1);
  });
Now all we need to do is test it out. After making changes to the server you will need to stop it. Running the app now and clicking on your blog post link you should see the blog content, which for me looks a like this:

And there you have a simple blog up and running. Now it's far from complete, but at this stage you could deploy it using Now Vercel. If you found the article helpful give it a share, or if you spotted anything wrong give me a shout on twitter and let me know!
Don't forget to check in a week or two where I will be adding taking care of all things SEO and adding the ability to preview an unpublished post locally.
Part 2: SEO in Next.js and Prismic
Read more

Deploying a Prismic and Next.js blog to Now

Prismic Preview in Next.js
Adding Prismic preview functionality to our blog so that you can preview unpublished posts. Excellent for when developing new features or content types.
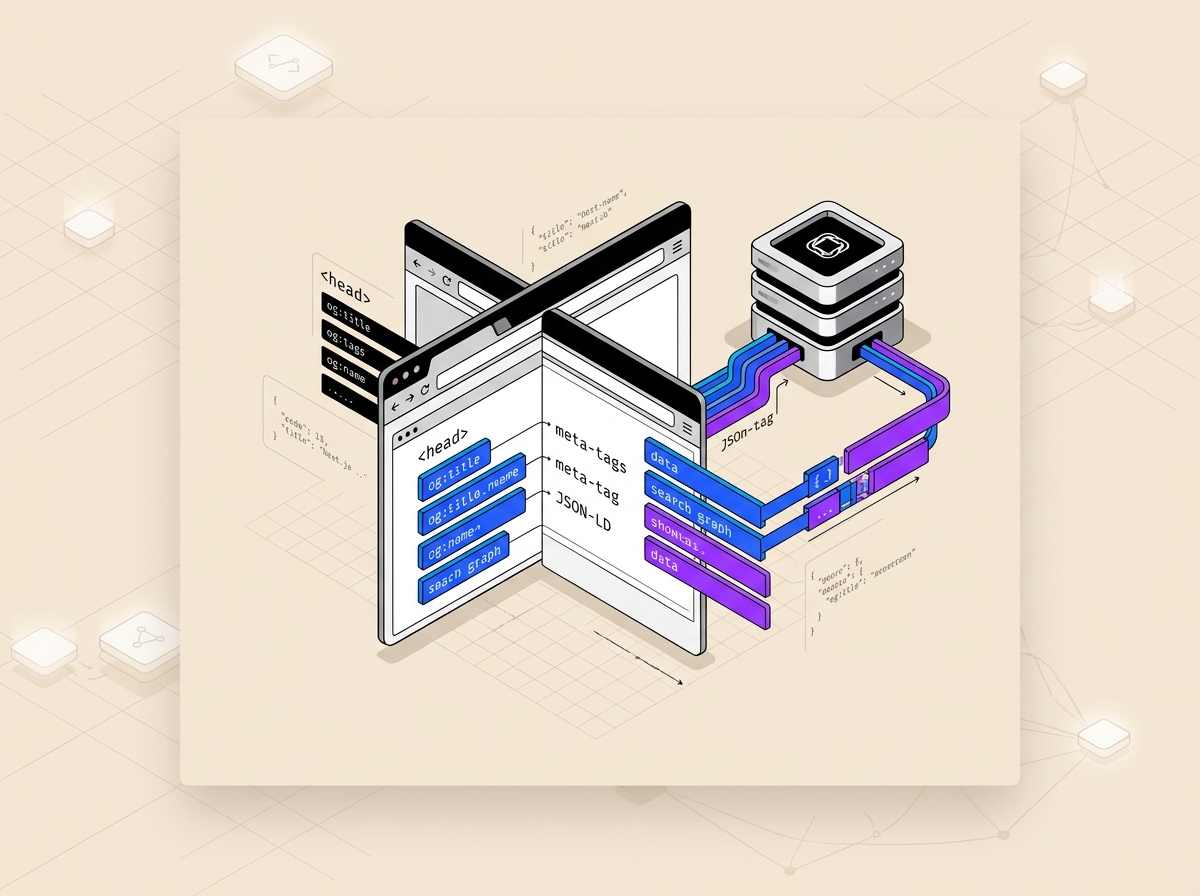
SEO in Next.js and Prismic
We look at default SEO, page specific SEO, Open Graph tags and JSON-LD. Along with enriching these with Prismic.